Table of Contents
📹결과 영상
🌟구현 포인트들
📌1. 별 쉐이더
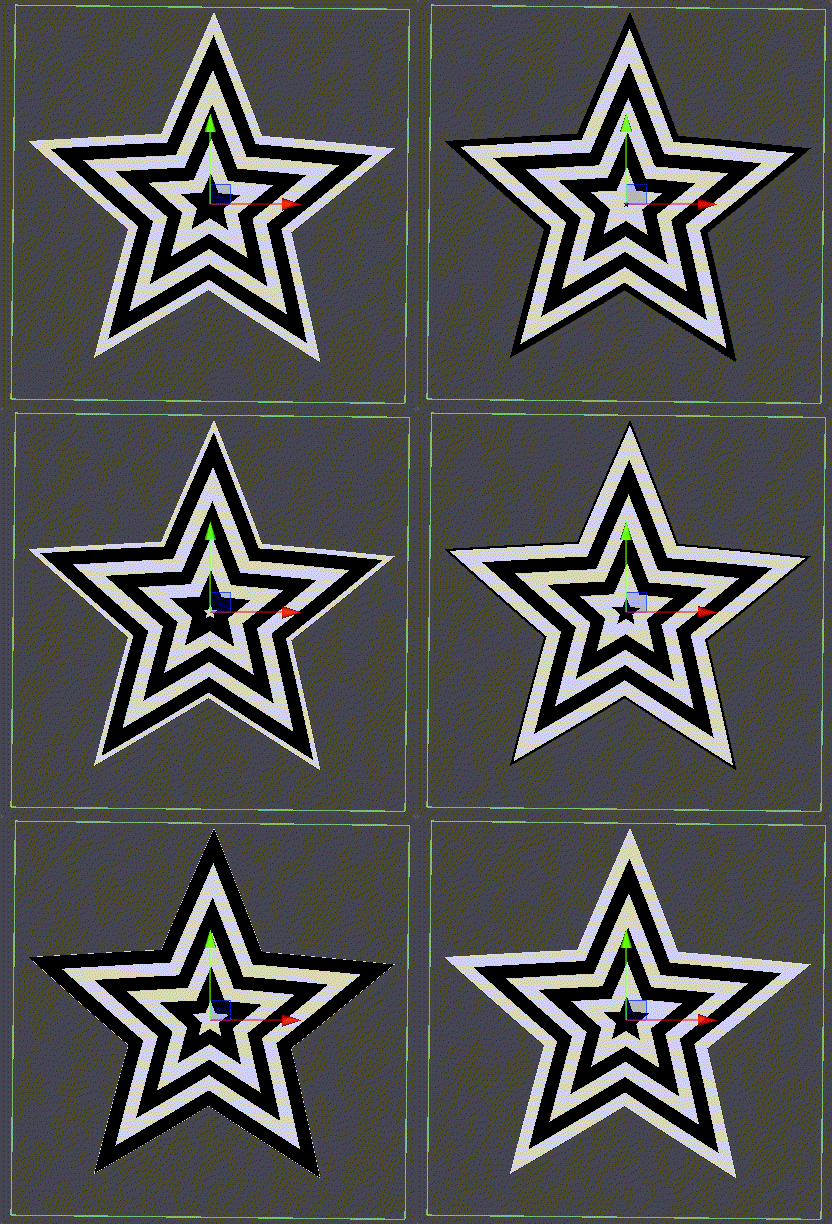
무한히 반복하는 별 쉐이더를 만들었습니다
이 쉐이더는 텍스쳐를 사용하지 않고 삼각함수를 이용해 별 모양을 만들어냅니다
온전히 자력으로 한건 아니고 GDShader로 만들어진 쉐이더를 유니티 쉐이더로 옮겨와서 문법을 수정했습니다
📜최종 쉐이더 소스
Shader "Oniboogie/PolarStar"
{
    Properties
    {
        [PerRendererData] _MainTex ("Sprite Texture", 2D) = "white" {}
        _Color ("Tint", Color) = (1,1,1,1)

        _StencilComp ("Stencil Comparison", Float) = 8
        _Stencil ("Stencil ID", Float) = 0
        _StencilOp ("Stencil Operation", Float) = 0
        _StencilWriteMask ("Stencil Write Mask", Float) = 255
        _StencilReadMask ("Stencil Read Mask", Float) = 255

        _ColorMask ("Color Mask", Float) = 15

        // PolarStar프로퍼티
        _Rotate("Rotate", Float) = 0
        _Frequency("Frequency", Float) = 5.0
        _StarSize("Star Size", Float) = 1.0
        _SineSpeed("Sine Speed", Float) = 5.0
        _Sharpness("Sharpness", Float) = 1.0
        _WhiteColor("White Color", Color) = (1,1,1,1)
        _BlackColor("Black Color", Color) = (0,0,0,1)
        _Pi5Test("Pi5 Test", Float) = 0.628318530718
        _Tiling("Tiling", Vector) = (1,1,1,1)
        _Offset("Offset", Vector) = (0,0,0,0)

        [Toggle(UNITY_UI_ALPHACLIP)] _UseUIAlphaClip ("Use Alpha Clip", Float) = 0
    }

    SubShader
    {
        Tags
        {
            "Queue"="Transparent"
            "IgnoreProjector"="True"
            "RenderType"="Transparent"
            "PreviewType"="Plane"
            "CanUseSpriteAtlas"="True"
        }

        Stencil
        {
            Ref [_Stencil]
            Comp [_StencilComp]
            Pass [_StencilOp]
            ReadMask [_StencilReadMask]
            WriteMask [_StencilWriteMask]
        }

        Cull Off
        Lighting Off
        ZWrite Off
        ZTest [unity_GUIZTestMode]
        Blend One OneMinusSrcAlpha
        ColorMask [_ColorMask]

        Pass
        {
            Name "Default"
        CGPROGRAM
            #pragma vertex vert
            #pragma fragment frag
            #pragma target 2.0

            #include "UnityCG.cginc"
            #include "UnityUI.cginc"

            #pragma multi_compile_local _ UNITY_UI_CLIP_RECT
            #pragma multi_compile_local _ UNITY_UI_ALPHACLIP


            struct appdata_t
            {
                float4 vertex   : POSITION;
                float4 color    : COLOR;
                float2 texcoord : TEXCOORD0;
                UNITY_VERTEX_INPUT_INSTANCE_ID
            };

            struct v2f
            {
                float4 vertex   : SV_POSITION;
                fixed4 color    : COLOR;
                float2 texcoord  : TEXCOORD0;
                float4 worldPosition : TEXCOORD1;
                float4  mask : TEXCOORD2;
                UNITY_VERTEX_OUTPUT_STEREO
            };

            sampler2D _MainTex;
            fixed4 _Color;
            fixed4 _TextureSampleAdd;
            float4 _ClipRect;
            float4 _MainTex_ST;
            float _UIMaskSoftnessX;
            float _UIMaskSoftnessY;
            int _UIVertexColorAlwaysGammaSpace;

            float _Rotate;
            float _Frequency;
            float _StarSize;
            float _SineSpeed;
            float _Sharpness;
            fixed4 _WhiteColor;
            fixed4 _BlackColor;

            float2 _Tiling;
            float2 _Offset;

            float PolarStar(float2 p)
            {
                float pi5 = 0.628318530718;

                float m2 = (atan2(p.y, p.x)/pi5 + 10) % 2.0;
                float adjust = -_Sharpness;

                return length(p) * cos((pi5 * adjust) * (m2 - 4.0 * step(1.0, m2) + 1.0)) - 1.0;
            }

            v2f vert(appdata_t v)
            {
                v2f OUT;
                UNITY_SETUP_INSTANCE_ID(v);
                UNITY_INITIALIZE_VERTEX_OUTPUT_STEREO(OUT);
                float4 vPosition = UnityObjectToClipPos(v.vertex);
                OUT.worldPosition = v.vertex;
                OUT.vertex = vPosition;

                float2 pixelSize = vPosition.w;
                pixelSize /= float2(1, 1) * abs(mul((float2x2)UNITY_MATRIX_P, _ScreenParams.xy));

                float4 clampedRect = clamp(_ClipRect, -2e10, 2e10);
                float2 maskUV = (v.vertex.xy - clampedRect.xy) / (clampedRect.zw - clampedRect.xy);
                OUT.texcoord = TRANSFORM_TEX(v.texcoord.xy, _MainTex);
                OUT.mask = float4(v.vertex.xy * 2 - clampedRect.xy - clampedRect.zw, 0.25 / (0.25 * half2(_UIMaskSoftnessX, _UIMaskSoftnessY) + abs(pixelSize.xy)));


                if (_UIVertexColorAlwaysGammaSpace)
                {
                    if(!IsGammaSpace())
                    {
                        v.color.rgb = UIGammaToLinear(v.color.rgb);
                    }
                }

                OUT.color = v.color * _Color;
                return OUT;
            }

            fixed4 frag(v2f IN) : SV_Target
            {
                //Round up the alpha color coming from the interpolator (to 1.0/256.0 steps)
                //The incoming alpha could have numerical instability, which makes it very sensible to
                //HDR color transparency blend, when it blends with the world's texture.
                const half alphaPrecision = half(0xff);
                const half invAlphaPrecision = half(1.0/alphaPrecision);
                IN.color.a = round(IN.color.a * alphaPrecision)*invAlphaPrecision;

                half4 color = IN.color * (tex2D(_MainTex, IN.texcoord) + _TextureSampleAdd);

                #ifdef UNITY_UI_CLIP_RECT
                half2 m = saturate((_ClipRect.zw - _ClipRect.xy - abs(IN.mask.xy)) * IN.mask.zw);
                color.a *= m.x * m.y;
                #endif

                #ifdef UNITY_UI_ALPHACLIP
                clip (color.a - 0.001);
                #endif

                float2 uv = IN.texcoord - 0.5 + _Offset;
                uv = uv * (2.0 + _Tiling);

                float t = 0.94 + _Rotate;
                float2x2 rotationMatrix = float2x2(float2(cos(t), -sin(t)), float2(sin(t), cos(t)));
                uv = mul(uv.xy, rotationMatrix);
                float d = PolarStar(uv) * 5.0;

                d = sin(d * _Frequency + _Time * _SineSpeed) / 10.0;
                d = smoothstep(0.0, 0.0, d);

                float cl = PolarStar(uv * 5.0 * _StarSize);
                clip(1.0 - cl);
                cl = smoothstep(1.0,1.0,cl);

                d = d-cl;

                fixed4 whiteCol = fixed4(d,d,d,d) * _WhiteColor;
                fixed4 blackCol = (1.0 - fixed4(d,d,d,d+cl)) * _BlackColor;

                color = color * (whiteCol + blackCol);

                return color;
            }
        ENDCG
        }
    }
}
📌2. 스텐실 마스크 쉐이더
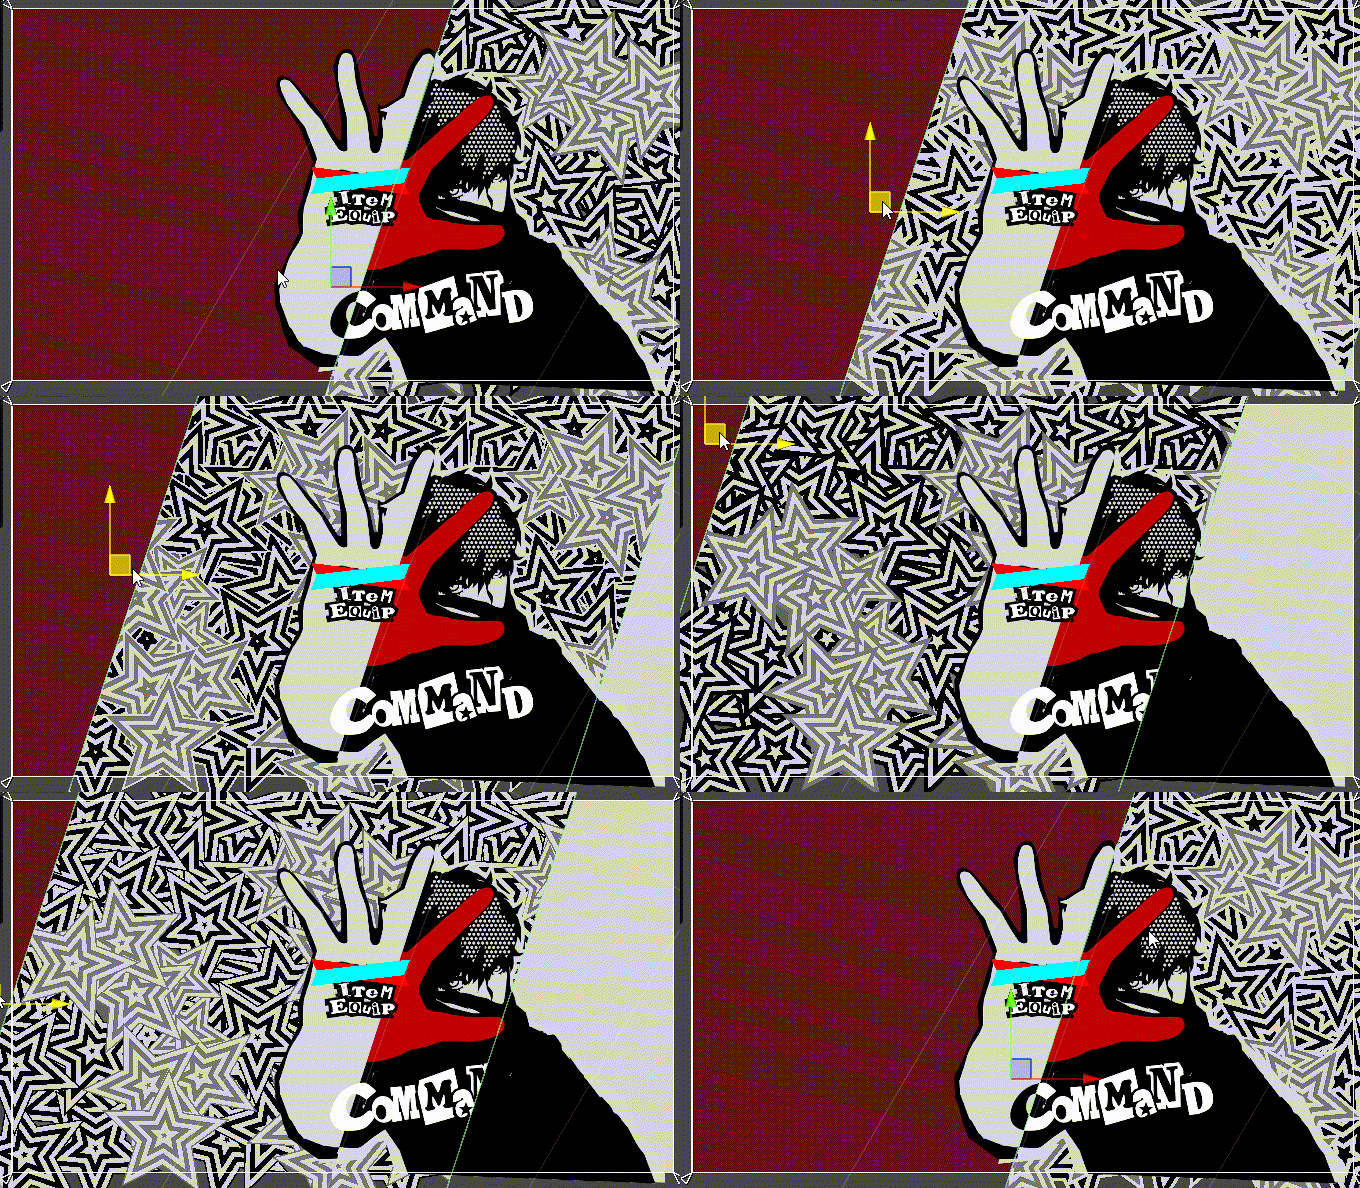
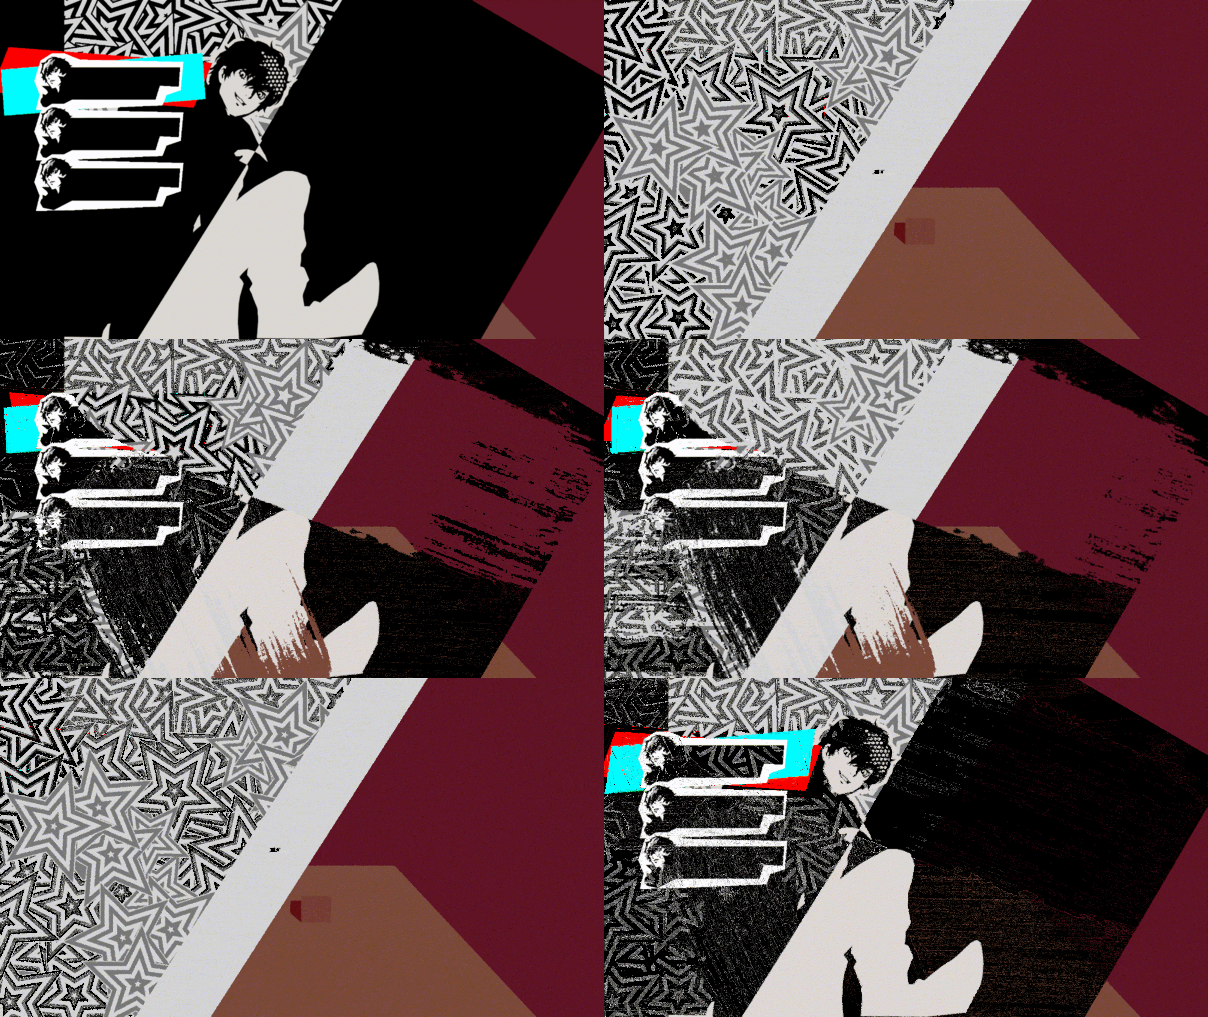
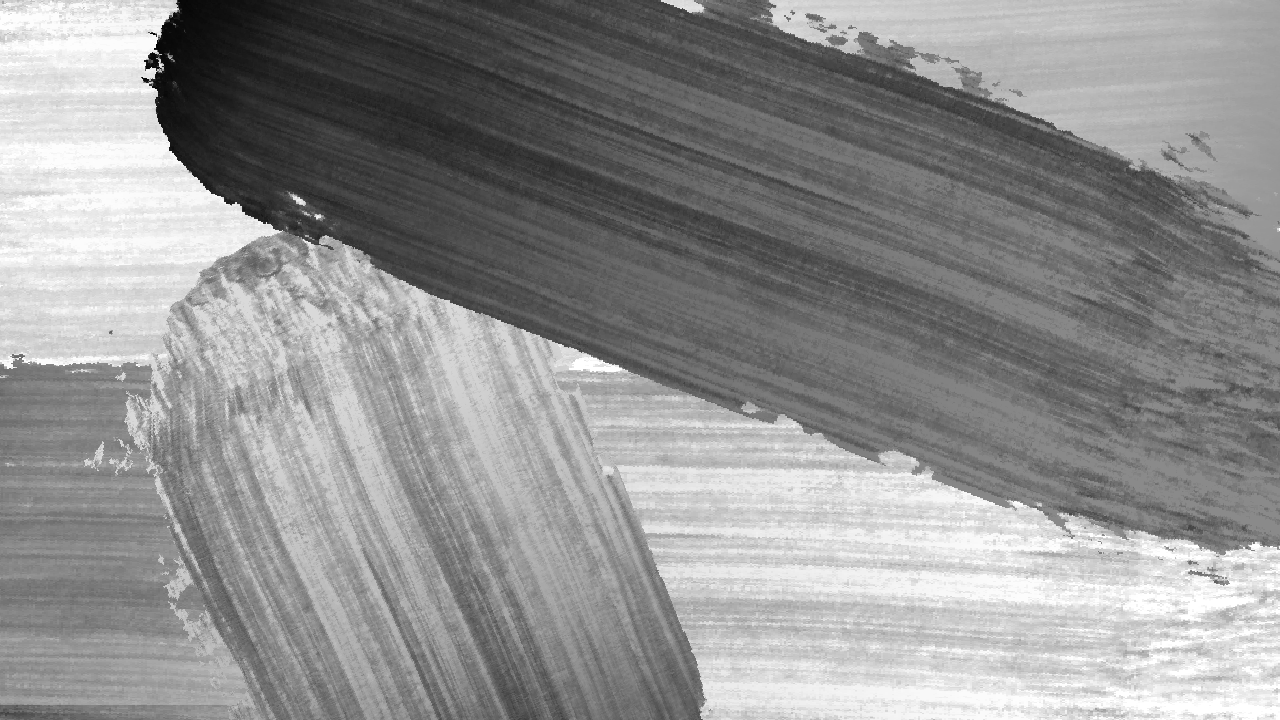
UI마스크와 마스크될 이미지가 부모-자식 트랜스폼 구조를 형성하지 않고, 마스크 기능을 사용하기위해 마스크 쉐이더 2종을 구현했습니다
📜 Rect 마스크 쉐이더
Shader "Oniboogie/StencilMask"
{
	Properties{

		[PerRendererData] _MainTex ("Sprite Texture", 2D) = "white" {}
		_ID("Mask ID", Int) = 1
	}
		SubShader{
			Tags{ "RenderType" = "Opaque" "Queue" = "Geometry+1" }
			ColorMask 0
			ZWrite off
			Stencil{
				Ref[_ID]
				Comp always
				Pass replace
			}
		Pass{
			CGINCLUDE
		struct appdata {
			float4 vertex : POSITION;
		};
		struct v2f {
			float4 pos : SV_POSITION;
		};


		v2f vert(appdata v) {
			v2f o;
			o.pos = UnityObjectToClipPos(v.vertex);
			return o;
		}
		half4 frag(v2f i) : SV_Target{

			return half4(1,1,1,1);
		}
			ENDCG

	}
}
}
📜 텍스쳐 알파 마스크 쉐이더
Shader "Oniboogie/StencilMaskTransitionWithID"
{
    Properties
    {
        _TransitionTex ("Transition Texture", 2D) = "white" {}
        _AlphaCutoff ("Alpha Cutoff", Range(0,1)) = 0.5
        _StencilRef ("Stencil Reference", Float) = 1 // 스텐실 ID 설정
        _StencilComp ("Stencil Comparison", Float) = 8
        _StencilPass ("Stencil Pass", Int) = 0 // 스텐실 패스 설정 (Replace, Keep 등)
    }

    SubShader
    {
        Tags { "Queue"="Overlay" "IgnoreProjector"="True" "RenderType"="Transparent" }
        Stencil
        {
            Ref [_StencilRef]        // 스텐실 ID 참조값
            // Comp [_StencilComp]      // 스텐실 비교 연산
            // Pass [_StencilPass]      // 스텐실 패스 설정
            Comp always
            Pass replace
        }

        Pass
        {
            Name "StencilMaskTransition"
            ZWrite Off
            Cull Off
            Blend SrcAlpha OneMinusSrcAlpha
            ColorMask 0 // 화면에 아무것도 그리지 않음

            CGPROGRAM
            #pragma vertex vert
            #pragma fragment frag
            #include "UnityCG.cginc"

            sampler2D _TransitionTex;
            float _AlphaCutoff;
            float4 _MainTex_ST;

            struct appdata
            {
                float4 vertex : POSITION;
                float2 uv : TEXCOORD0;
            };

            struct v2f
            {
                float2 uv : TEXCOORD0;
                float4 vertex : SV_POSITION;
            };

            v2f vert (appdata v)
            {
                v2f o;
                o.vertex = UnityObjectToClipPos(v.vertex);
                o.uv = v.uv;
                return o;
            }

            half4 frag (v2f i) : SV_Target
            {
                // Transition Texture의 알파 값을 사용하여 마스크 처리
                half4 col = tex2D(_TransitionTex, i.uv);
                if (col.r < _AlphaCutoff) // 검은 부분을 기준으로 클리핑
                    discard;

                return col;
            }
            ENDCG
        }
    }

    FallBack "Transparent"
}
구현에는 MinionsArt님의 글을 참고했습니다
📌3. 폴리곤 UI 이미지
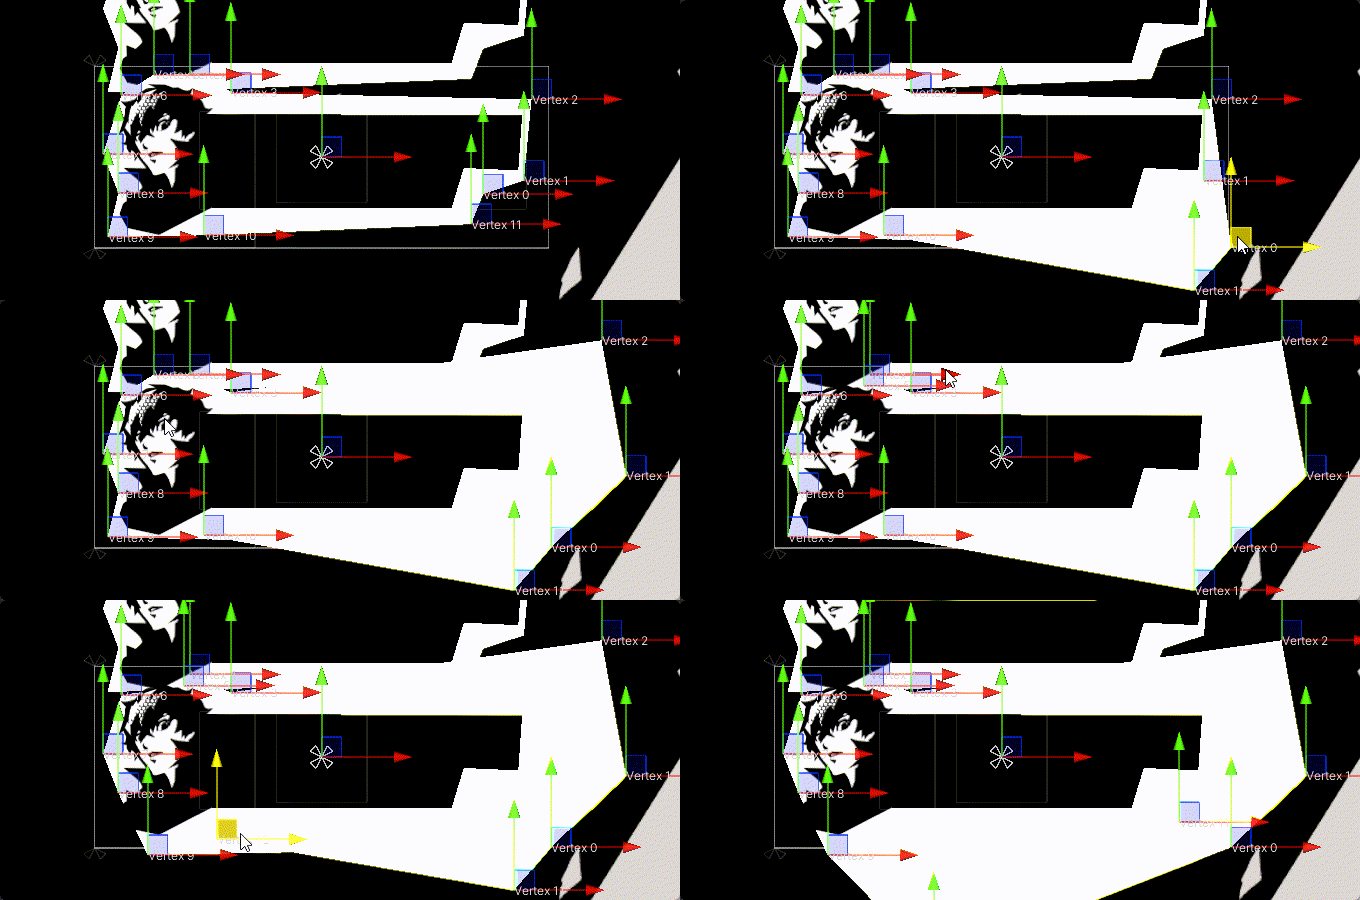
Godot엔진의 `Plygon2D`컴포넌트에서 영감을 받아 UI이미지를 원하는 폴리곤 모양으로 생성할 수 있는 기능을 구현했습니다
📜 PolygonUI.cs
using UnityEngine;
using UnityEngine.UI;
using System.Collections.Generic;

[RequireComponent(typeof(CanvasRenderer))]
public class PolygonUI : MaskableGraphic
{
    // 폴리곤의 꼭지점 리스트
    [SerializeField]
    private List<Vector2> vertices = new List<Vector2>()
    {
        new Vector2(0, 0),
        new Vector2(100, 0),
        new Vector2(100, 100),
        new Vector2(0, 100)
    };

    // 폴리곤 색상
    public Color polygonColor = Color.white;

    // 선 두께 (옵션)
    public float borderWidth = 0f;

    protected override void OnPopulateMesh(VertexHelper vh)
    {
        vh.Clear();

        if (vertices.Count < 3)
            return; // 최소한 3개의 꼭지점이 있어야 다각형을 그릴 수 있음

        // 내부 색상을 위한 정점 추가
        AddPolygonVertices(vh, vertices, polygonColor);

        // 삼각형을 그리기 위한 인덱스 설정
        for (int i = 1; i < vertices.Count - 1; i++)
        {
            vh.AddTriangle(0, i, i + 1);
        }

        // 테두리 그리기 (옵션)
        if (borderWidth > 0f)
        {
            DrawPolygonBorder(vh, vertices, borderWidth);
        }
    }

    // 다각형의 내부 정점 추가
    private void AddPolygonVertices(VertexHelper vh, List<Vector2> vertices, Color color)
    {
        foreach (var vertex in vertices)
        {
            UIVertex uiVertex = UIVertex.simpleVert;
            uiVertex.position = vertex;
            uiVertex.color = color;
            vh.AddVert(uiVertex);
        }
    }

    // 다각형의 테두리 그리기
    private void DrawPolygonBorder(VertexHelper vh, List<Vector2> vertices, float width)
    {
        // 테두리 색상을 정하기 위한 기본 색상
        Color borderColor = Color.black;

        for (int i = 0; i < vertices.Count; i++)
        {
            Vector2 current = vertices[i];
            Vector2 next = vertices[(i + 1) % vertices.Count];

            Vector2 direction = (next - current).normalized;
            Vector2 normal = new Vector2(-direction.y, direction.x) * width;

            UIVertex[] quad = new UIVertex[4];

            quad[0].position = current - normal;
            quad[1].position = current + normal;
            quad[2].position = next + normal;
            quad[3].position = next - normal;

            for (int j = 0; j < 4; j++)
            {
                quad[j].color = borderColor;
                vh.AddVert(quad[j]);
            }

            vh.AddTriangle(vh.currentVertCount - 4, vh.currentVertCount - 3, vh.currentVertCount - 2);
            vh.AddTriangle(vh.currentVertCount - 4, vh.currentVertCount - 2, vh.currentVertCount - 1);
        }
    }

    // 인스펙터에서 꼭지점 리스트를 노출시킴
    public List<Vector2> Vertices
    {
        get => vertices;
        set
        {
            vertices = value;
            SetVerticesDirty();
        }
    }

    // 색상과 테두리 두께 업데이트
    public Color PolygonColor
    {
        get => polygonColor;
        set
        {
            polygonColor = value;
            SetVerticesDirty();
        }
    }

    public float BorderWidth
    {
        get => borderWidth;
        set
        {
            borderWidth = value;
            SetVerticesDirty();
        }
    }
}
📜 PolygonUIEditor.cs
#if UNITY_EDITOR
using UnityEngine;
using UnityEditor;
using System.Collections.Generic;

[CustomEditor(typeof(PolygonUI))]
public class PolygonUIEditor : Editor
{
    private PolygonUI polygon2D;

    private void OnEnable()
    {
        polygon2D = (PolygonUI)target;
    }

    private void OnSceneGUI()
    {
        // 꼭지점들을 씬에 핸들로 표시하고 드래그할 수 있게 만듦
        for (int i = 0; i < polygon2D.Vertices.Count; i++)
        {
            Vector2 vertex = polygon2D.Vertices[i];
            Vector3 worldPos = polygon2D.transform.TransformPoint(vertex);

            // 드래그 가능한 핸들을 생성하여 꼭지점 위치를 수정 가능하게
            EditorGUI.BeginChangeCheck();
            Vector3 newWorldPos = Handles.PositionHandle(worldPos, Quaternion.identity);

            if (EditorGUI.EndChangeCheck())
            {
                Undo.RecordObject(polygon2D, "Move Polygon Vertex");
                Vector2 newLocalPos = polygon2D.transform.InverseTransformPoint(newWorldPos);
                polygon2D.Vertices[i] = newLocalPos;

                // 폴리곤을 업데이트
                polygon2D.SetVerticesDirty();
            }

            // 꼭지점 번호를 씬에 표시
            Handles.Label(worldPos, $"Vertex {i}");
        }

        // 새로운 꼭지점 추가 버튼
        if (Handles.Button(polygon2D.transform.position, Quaternion.identity, 0.1f, 0.1f, Handles.DotHandleCap))
        {
            Undo.RecordObject(polygon2D, "Add Polygon Vertex");
            polygon2D.Vertices.Add(Vector2.zero);
            polygon2D.SetVerticesDirty();
        }
    }

    public override void OnInspectorGUI()
    {
        DrawDefaultInspector();

        // 인스펙터에 "모든 버텍스 제거" 버튼 추가
        if (GUILayout.Button("모든 버텍스 제거"))
        {
            Undo.RecordObject(polygon2D, "Clear Vertices");
            polygon2D.Vertices.Clear();
            polygon2D.SetVerticesDirty();
        }

        // 인스펙터에 "폴리곤 재설정" 버튼 추가
        if (GUILayout.Button("폴리곤 재설정"))
        {
            Undo.RecordObject(polygon2D, "Reset Polygon");
            polygon2D.Vertices = new List<Vector2>
            {
                new Vector2(0, 0),
                new Vector2(100, 0),
                new Vector2(100, 100),
                new Vector2(0, 100)
            };
            polygon2D.SetVerticesDirty();
        }
    }
}
#endif
📌4. UI 이미지 Wiggle이펙트

UI이미지의 메쉬를 움직여 Wiggle이펙트를 구현했습니다
`IMeshModifier`인터페이스를 상속받아 예약함수인 `ModifyMesh`메소드 내에서 버텍스를 조정했습니다
📜 WiggleEffect.cs
using System.Collections;
using System.Collections.Generic;
using UnityEngine;
using UnityEngine.UI;

public class WiggleEffect : MonoBehaviour, IMeshModifier
{
    public AnimationCurve wiggleCurve = AnimationCurve.EaseInOut(0, 0, 1, 1); // 기본적으로 부드러운 곡선
    public float wiggleAmountX = 5f;  // 흔들림의 크기
    public float wiggleAmountY = 5f;
    public float speed = 2f;         // 흔들림 속도
    public float curveDuration = 1f; // 곡선의 주기 (wiggle 애니메이션의 주기)

    private void Update()
    {
        // UI 메쉬를 지속적으로 업데이트하기 위해 재갱신
        GetComponent<Graphic>().SetVerticesDirty();
    }

    public void ModifyMesh(VertexHelper vh)
    {
        if (!this.isActiveAndEnabled) return;

        var vertices = new List<UIVertex>();
        vh.GetUIVertexStream(vertices);

        // 현재 시간을 0과 1 사이의 값으로 정규화
        //float time = (Time.time * speed) % curveDuration / curveDuration;
        float time = Mathf.PingPong(Time.time * speed, 1f);

        for (int i = 0; i < vertices.Count; i++)
        {
            UIVertex vertex = vertices[i];

            // AnimationCurve를 사용하여 흔들림 값을 계산
            float curveValue = wiggleCurve.Evaluate(time); // 0 ~ 1 범위의 곡선 값
            float wiggleOffsetX = curveValue * wiggleAmountX; // 곡선 값에 따른 흔들림 크기
            float wiggleOffsetY = curveValue * wiggleAmountY; // 곡선 값에 따른 흔들림 크기

            // 버텍스의 Y 위치에 wiggle 효과 적용
            vertex.position.y += Mathf.Sin(vertex.position.x * 0.1f + time * Mathf.PI * 2) * wiggleOffsetY;
            vertex.position.x += Mathf.Sin(vertex.position.y * 0.1f + time * Mathf.PI * 2) * wiggleOffsetX;

            vertices[i] = vertex; // 변형된 버텍스를 리스트에 다시 반영
        }

        vh.Clear();
        vh.AddUIVertexTriangleStream(vertices);
    }

    public void ModifyMesh(Mesh mesh)
    {
        // IMeshModifier 인터페이스의 구현 요구사항으로 비워둠
    }
}
🖇️ 구현에 참고한 레퍼런스
Chavafei님의 Godot엔진으로 제작한 페르소나 5 UI 유튜브 영상과 깃허브 저장소의 소스를 참고하였으며,
아트 리소스도 사용하였습니다.
'Unity > Portfolio' 카테고리의 다른 글
| [Unity] 3D로 구현해본 승리의 여신 니케 (4) | 2024.10.28 |
|---|---|
| 대구 게임 아카데미 프로젝트 3종 (0) | 2024.06.22 |
| [Unity] 퍼즐게임 레벨에디터 구현 (0) | 2022.07.30 |

![[Unity] 페르소나 5 메뉴 UI 구현](https://img1.daumcdn.net/thumb/R750x0/?scode=mtistory2&fname=https%3A%2F%2Fblog.kakaocdn.net%2Fdna%2FFsm35%2FbtsLzZ9smk7%2FAAAAAAAAAAAAAAAAAAAAAL1rgTRRAcNGacuPoBAZ4Ec37vOgaS9rvsF37-LeTz-H%2Fimg.png%3Fcredential%3DyqXZFxpELC7KVnFOS48ylbz2pIh7yKj8%26expires%3D1769871599%26allow_ip%3D%26allow_referer%3D%26signature%3DqHNkZWpOZz9p2yKeI5zMbl6r1M0%253D)
![[Unity] 3D로 구현해본 승리의 여신 니케](https://img1.daumcdn.net/thumb/R750x0/?scode=mtistory2&fname=https%3A%2F%2Fblog.kakaocdn.net%2Fdna%2FODmXJ%2FbtsKmkFWYwR%2FAAAAAAAAAAAAAAAAAAAAAPpgSqzJGFZ5SeYzrWeDvkDxoeSUps9zgWarm5TfF5d4%2Fimg.png%3Fcredential%3DyqXZFxpELC7KVnFOS48ylbz2pIh7yKj8%26expires%3D1769871599%26allow_ip%3D%26allow_referer%3D%26signature%3D4F3uHnQwkW1wvLIkqQYbZPuO7Rc%253D)

![[Unity] 퍼즐게임 레벨에디터 구현](https://img1.daumcdn.net/thumb/R750x0/?scode=mtistory2&fname=https%3A%2F%2Fblog.kakaocdn.net%2Fdna%2FdhMtM8%2FbtsH9uRpEz6%2FAAAAAAAAAAAAAAAAAAAAABcqbU4c4mxdPheRXoIQYr_W8V9Kyhlb1zrVv-OLDJVa%2Fimg.png%3Fcredential%3DyqXZFxpELC7KVnFOS48ylbz2pIh7yKj8%26expires%3D1769871599%26allow_ip%3D%26allow_referer%3D%26signature%3Dtz2wOXK%252Bn4rq8t5LolldXVwxQ1w%253D)